- Help Centre
- Getting Started
- Custom Branding
How to enable Custom Branding
To enable custom branding for payment links and email receipts, please follow these steps:
- Navigate to the 'Branding' page, within the 'Settings' dropdown on the left.
If you are on our Collect Plus or Premium package already, you are able to use custom branding immediately! - If you are not on one of these plans, you can select a blue 'Upgrade plan' button. For more information on our packages features and costs, please click here.

- Select the Collect Plus or Premium plan and click 'Continue'
- You will then be asked to confirm your order. If you wish to continue, you will select to 'Proceed To Checkout'
- Please fill out your billing address and payment details and then click 'Continue'
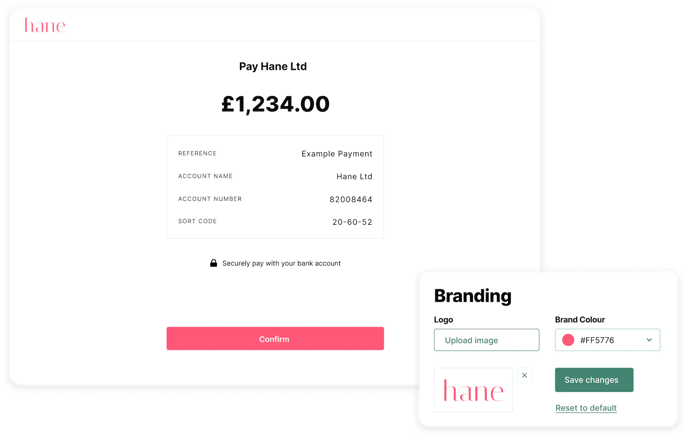
- Once you have enabled custom branding make sure to refresh the page for the update to be made to your organisation. You can then upload a logo and change the brand colour that will be used on your email receipts and payment links.
Take a look below to see what the custom branding looks like once it has been enabled -