Step by step process on how to correctly export a CSV for your bills and upload them into Crezco
Before exporting please note the following:
- You can export invoices or bills, credit notes, prepayments, and overpayments to a comma-separated values (CSV) file. You can't export repeating invoice or bill templates.
- Your user role determines what you can export. If you can’t access the detail in Xero, you can't export it.
- The export includes all transactions by default (up to a maximum of 500). You can export by status, or add a search to filter transactions into groups if you have more than 500 to export.
- Each transaction line item is listed as a separate line in the exported CSV file. This keeps the file consistent with the format needed to import invoices and bills back into Xero.
How to export your bill pay runs on Xero
1. Navigate to the Business drop down menu in Xero and select 'Bills to pay'
2. Select 'Awaiting payments'.
3. You will then be able to check off the bills you would like to include on CSV export
4. Once you have selected all the bills you wanted to include, click 'Make Payment', then 'Pay x bills'
5. Select the bank account that this money will be coming from.
6. Click on the 'Payment method' drop down menu and select 'Create a payment file'
7. Enter in your Payment Reference - This will be reference name imported into Crezco. We suggest a reference that helps you keep track of which bills have been paid and when
8. Click on 'Create payment' and if everything looks good, click the blue button to 'Finish & view batch'
9. Finally you will want 'Export batch payment' and select CSV
Please note: Xero will export your batches by supplier. This means that if a supplier has more than one bill that you have selected, it will group that bill amount into one lump sum
How to import the file into Crezco
1. Log into your Crezco account, and navigate to the 'Accounts Payables' tab on the left hand side of your page
2. Next, click 'Import Payments' on the right-hand side of the page
3. To import the newly exported Xero CSV you will need to select the 'Click here to up load' in the Drag and drop a file here tile
4. Please make sure to select the CSV type you exported, which would be Xero General Bills and then click 'Upload'.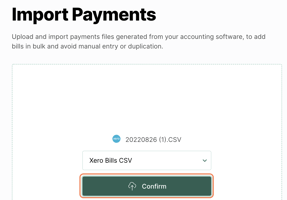
-
-
Newly added contacts will be indicated with a green dot next to their name in the payees column.
-
Invalid references will be highlighted, allowing you to edit and ensure they meet the necessary requirements.
-
Payees with incorrect bank information will be highlighted, providing the opportunity to correct the sort code and account number as needed.
-
6. If everything on the import looks correct, click to 'Import selected payments'
7. The bills/payroll will now show up in the 'Payables' tab of the 'Accounts Payable' section, ready to be processed!
If you have any issues with the CSV import, please check out our help centre article - What to do if CSV upload fails.